Recording 16:9 1080p Videos on 3440p Ultrawide Monitor Using OBS
November 15, 2022
Ultrawide monitors are great but the 21:9 aspect ratio means recording a 1080p video is not as straightforward as with a standard 16:9 screen. The standard (practially minimum) video resolution accepted by many players (ex: Youtube) is 1920x1080p which is a 16:9 aspect ratio. So how do you record a 1920x1080 or any 16:9 resolution on an ultrawide monitor?
Step 1: Resize target window to be 1920x1080p or any 16:9 resolution.
The basic idea is to size the window (or area) you are recording to be in a 16:9 resolution. Technically any 16:9 aspect ratio (ex: 1600x900) is fine but it is better to make the window exactly 1920x1080p so there isn’t any pixel blurring from the eventual enlargement to 1920x1080p.
How to do this
Any means you use to resize the window to 1920x1080 pixels is fine, but since I am on linux I will share how I quickly did it.
First install wmctrl. You can use your default package manager or homebrew (brew install wmctrl) if you have it installed.
- Get window:
wmctrl -l- Copy a substring of the final column (window name) for the window you want.
- Resize window:
wmctrl -r <substring> -e gravity,left,up,width,height- Note: gravity (staying on top vs. behind)
- Ex:
wmctrl -r "Atom" -e 0,0,0,1920,1080
Step 2: Configure OBS Settings
Make sure in Settings -> Video that base and output resolution are both set to 1920x1080p.
Base resolution: This is the resolution of the canvas OBS is recording, since we want to record all of our 1080p window, we set it 1920x1080p. You could set it to a different resolution (but still 16:9) like 1600x900 if you had to have a smaller window size for whatever reason.
Output resolution: This is the final resolution your video will be output to. If the base and output resolution is the same there will be no scaling which would affect (most likely degrade) the final product. If they are different however, scaling will occur. Ex: a 1600x900 video will be scaled up to fit 1920x1080p which will make the final video slightly blurrier than what was recorded.
In Settings -> Output: Choose Indistinguishable Quality. In my experience the file size is not that large, of course it depends on what you are recording (how much movement, etc..). In my experience the file size for this setting has come out around ~20MB/min which is not bad. If the file size is too large, you can use the High Quality option.
Step 3 Option A: Window Capture
If you only need to capture a specific window, and do not need any other windows (including sub windows opened by main window) then the simplest option is to use a window capture.
Sources -> Add (plus button) -> Window Capture.
Choose the target window to capture and start recording.
Step 3 Option B: Cropped Screen Capture
If you need to capture multiple windows or sub windows opened by the main window, then you can do a cropped screen capture. A screen capture records whatever is on the screen regardless of which window is open. We will then crop the screen capture to be a 1920x1080 area on our desktop.
Sources -> Add (plus button) -> Screen Capture.
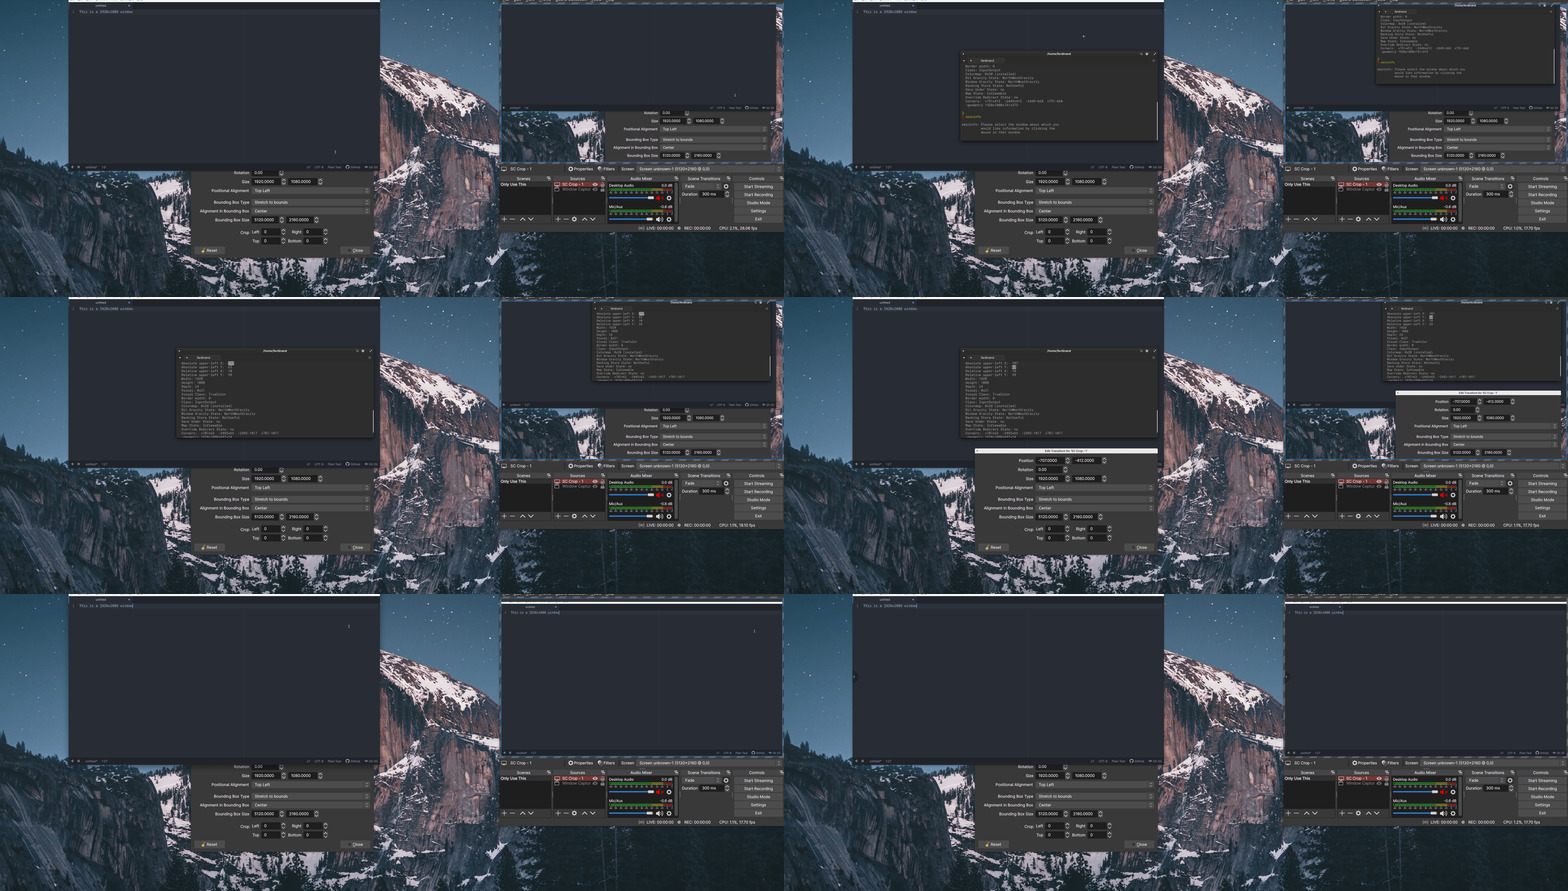
To crop the screen capture, we need to use the transform tool. To use the transform tool, right click on the screen capture source -> Transform -> Edit Transform. In the position field, you need to specify the x and y position to start at. In linux, you can obtain these by using xwininfo and providing the negative values of the absolute x and y that is returned by the command. Check the gif below for an example of this. You can also drag the obs capture screen manually to achieve the transform (if you don’t want to enter position values). Check youtube video on this.
Youtube video on transform tool: https://www.youtube.com/watch?v=d26TUeowe6I
Example of using xwininfo on linux to get values for source transform
Left side: 1920x1080p window to record, source transform obs dialog, terminal to run xwininfo.
Right side: Shows what OBS is capturing.
Explanation: You will see that I first use xwininfo to get the position of the window to record (atom in this case), then I used the negative of those values, and then finally on the right you can see OBS has been adjusted to perfectly capture the entire window. Note the gnome header (gray bar with X close window icon) is not included since xwininfo exludes that in its measurements. That is fine for me but if I want to show the gnome header, then I just decrease the height returned by xwininfo by 31 (depends on the height of your header).

Misc: General OBS Recording Tips
Some tips
- Buy a pop filter or use a mic with a built in pop filter.
- Use OBS noise gate filter to take out (vocal?) sounds under a certain threshold.
- I would recommend to use noise suppression as well which takes out non-vocal sounds, however, noise suppression is a bit wonky. If there is noise while you are talking it will muffle out your voice along with the noise. Ex: If you are typing on a loud keyboard while talking you will see that noise suppression will take your voice out whenever you are typing on the keyboard. It essentially cuts out audio with noise in it, which is bad but understandable since trying to separate and remove noise signal from audio is difficult (everything is jumbled together). I’d recommended fixing it externally like getting a quieter keyboard or closing windows, etc.
- Buy a mic stand/arm because sound is clearer when the mic is at the same height level as your mouth.
- Speak 6 - 14 inches away from mic to help reduce plosives and other breathing sounds.
More Reading:
- X Utils: http://tripie.sweb.cz/utils/wmctrl/
- OBS source transform: https://www.youtube.com/watch?v=d26TUeowe6I